
🎉 Introduction
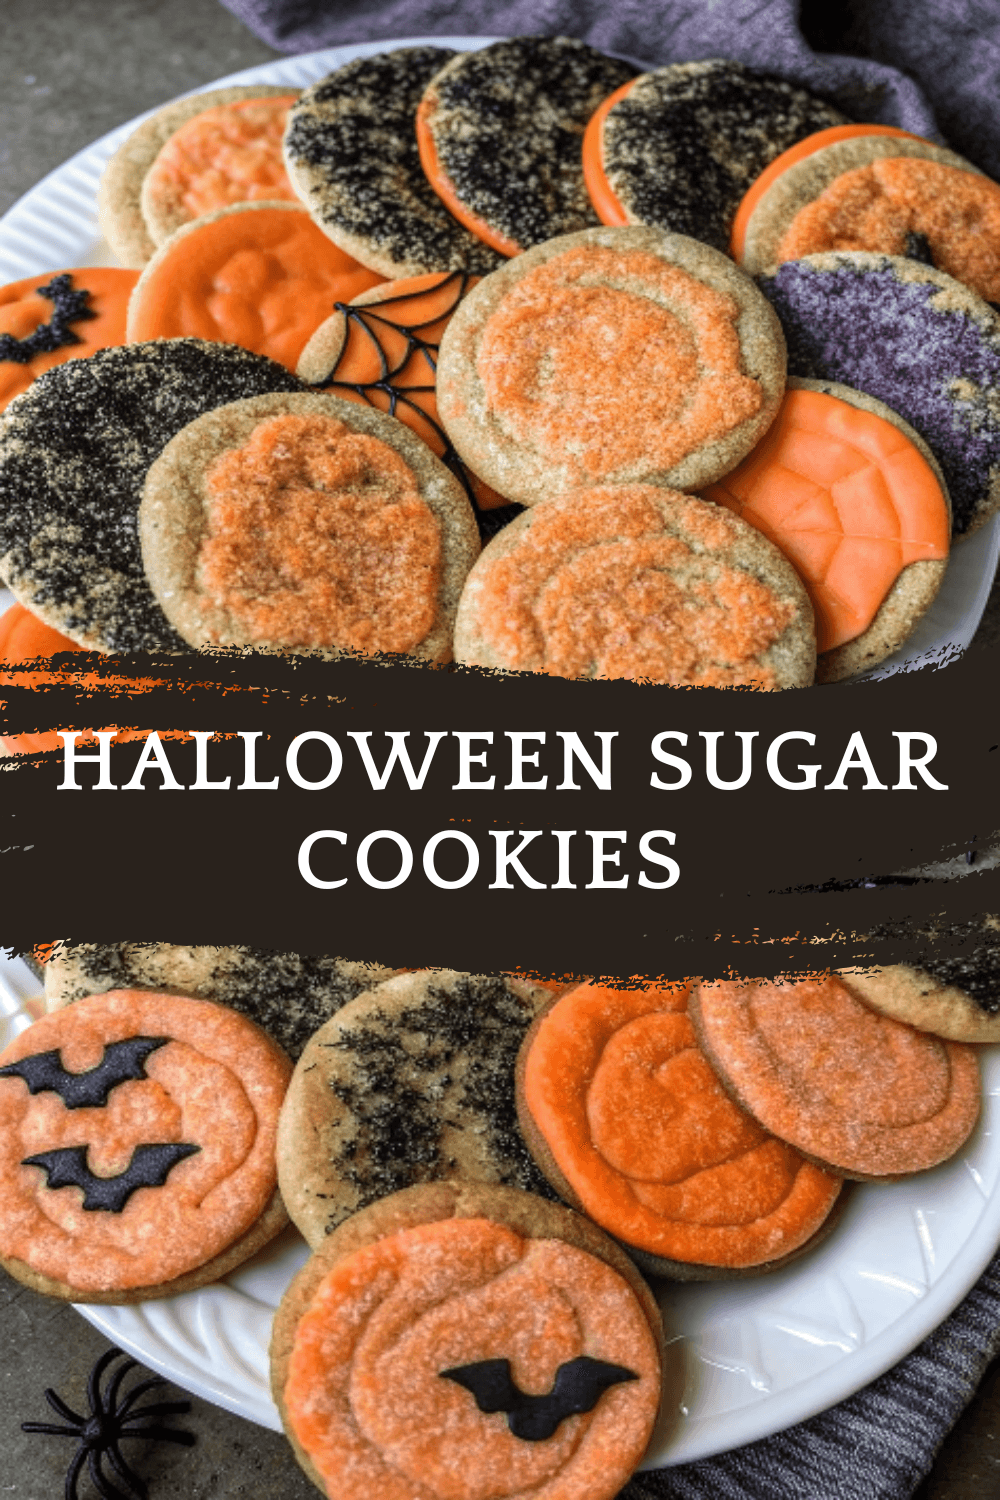
Halloween isn’t just about costumes and pumpkins—it’s also the ultimate holiday for creative baking! These Halloween Sugar Cookies are soft, buttery, and perfect for decorating with spooky shapes and colorful icing. Whether you’re making them for a Halloween party, trick-or-treat favors, or a fun family baking activity, these cookies are the perfect festive treat.
With simple pantry ingredients, you’ll bake cookies that hold their shape beautifully and taste buttery with just the right amount of sweetness. Decorate them with royal icing, buttercream, or candy sprinkles to make pumpkins, ghosts, bats, witches’ hats, and more.
These cookies aren’t just desserts—they’re edible Halloween art projects the whole family can enjoy.
🧰 Equipment Needed
- Mixing bowls (large and medium)
- Hand or stand mixer
- Measuring cups and spoons
- Rolling pin
- Cookie cutters (Halloween shapes: pumpkins, bats, ghosts, etc.)
- Baking sheet lined with parchment paper
- Cooling rack
- Piping bags & tips (for decorating)
- Small bowls for icing colors
🛒 Ingredients
For the Sugar Cookies:
- 2 ¾ cups all-purpose flour
- 1 tsp baking powder
- ½ tsp salt
- 1 cup unsalted butter, softened
- 1 cup granulated sugar
- 1 large egg
- 2 tsp vanilla extract (or almond extract for flavor variation)
For the Royal Icing (optional):
- 3 cups powdered sugar
- 2 tbsp meringue powder (or 2 egg whites)
- 4–5 tbsp water
- Gel food coloring (orange, black, purple, green)
👩🍳 Directions
Step 1: Prep the Dough Base
- In a medium bowl, whisk together flour, baking powder, and salt.
- Set aside.
Step 2: Cream Butter & Sugar
- In a large bowl, beat softened butter and granulated sugar until light and fluffy.
Step 3: Add Egg & Vanilla
- Mix in egg and vanilla extract until smooth.
Step 4: Combine Dry & Wet Ingredients
- Gradually add dry mixture into wet mixture until dough forms.
- If dough is too sticky, add 1–2 tbsp flour.
Step 5: Chill Dough
- Divide dough into 2 discs, wrap in plastic, and refrigerate for 1 hour.
- Chilling helps cookies keep their shape.
Step 6: Roll & Cut Shapes
- Preheat oven to 350°F (175°C).
- Roll dough on lightly floured surface to ¼-inch thickness.
- Cut with Halloween cookie cutters and place on parchment-lined baking sheet.
Step 7: Bake
- Bake 8–10 minutes, until edges are just set (not browned).
- Cool 5 minutes on pan, then transfer to cooling rack.
Step 8: Make Icing
- Beat powdered sugar, meringue powder, and water until smooth.
- Divide into bowls and tint with gel food coloring.
Step 9: Decorate
- Outline cookies with thicker icing, then flood with thinned icing.
- Add sprinkles or piping details (spiderwebs, pumpkin faces, etc.).
Step 10: Serve & Enjoy
- Let icing dry completely before stacking or packaging.
🍽️ Servings & Timing
- Servings: 24–30 cookies (depending on cutter size)
- Prep time: 20 minutes (plus 1 hour chilling)
- Bake time: 10 minutes per batch
- Decorating time: 30–60 minutes
- Total time: About 2–2 ½ hours
🧊 Storage & Reheating
- Room Temperature: Store decorated cookies in an airtight container for up to 1 week.
- Freezer (undecorated): Freeze cut-out dough or baked cookies up to 2 months. Thaw before decorating.
- Reheating: Not needed—best served at room temperature.
🥄 Variations
- Pumpkin Spice Sugar Cookies: Add 1 tsp pumpkin pie spice to dough.
- Chocolate Sugar Cookies: Swap ¼ cup flour for cocoa powder.
- Glazed Sugar Cookies: Use simple powdered sugar + milk glaze instead of royal icing.
- Buttercream Decorated: Frost with orange, black, and purple buttercream for a softer finish.
- Glow-in-the-Dark Cookies: Use neon gel colors for an extra spooky look under blacklight.
❓ 10 FAQs
- Why chill the dough?
- It prevents cookies from spreading and losing shape.
- Do I have to use royal icing?
- No, buttercream or glaze works too.
- What’s the best thickness for cut-out cookies?
- About ¼ inch thick—thinner cookies may burn.
- Can I use salted butter instead?
- Yes, but reduce added salt to ¼ tsp.
- How do I get vibrant Halloween colors?
- Use gel food coloring, not liquid.
- Can I make the dough ahead of time?
- Yes, chill up to 3 days or freeze up to 2 months.
- How long should icing dry before stacking?
- At least 6–8 hours for royal icing.
- Can kids help decorate?
- Absolutely! This recipe is perfect for family fun.
- Can I double the recipe?
- Yes, it scales easily for large parties.
- What’s the best way to package these for gifting?
- Wrap individually in cellophane bags tied with ribbon.
🏁 Conclusion
These Halloween Sugar Cookies are the ultimate festive baking project. With buttery soft cookies as the base and endless decorating possibilities, they’re fun, delicious, and perfect for spooky season.
Bake a batch for parties, trick-or-treating, or simply as a creative family activity—you’ll love how these cookies look and taste. Plus, they’re the kind of treat that makes Halloween memories last a lifetime.
Halloween Sugar Cookies | Fun, Festive & Deliciously Sweet
Ingredients
✨ Kitchen Essentials You’ll Love
Quick picks I trust for better results, faster prep, and easier cleanup.
-
🍳View ↗
Lodge Seasoned Cast Iron Skillet
-
⚡View ↗
Instant Pot Duo Plus 9-in-1 Electric
-
🔥View ↗
CHEFMAN Digital Air Fryer XL 10L
Disclosure: As an Amazon Associate, I earn from qualifying purchases at no extra cost to you.
Equipment
Method
- In a medium bowl, whisk together flour, baking powder, and salt.
- Set aside.
- In a large bowl, beat softened butter and granulated sugar until light and fluffy.
- Mix in egg and vanilla extract until smooth.
- Gradually add dry mixture into wet mixture until dough forms.
- If dough is too sticky, add 1–2 tbsp flour.
- Divide dough into 2 discs, wrap in plastic, and refrigerate for 1 hour.
- Chilling helps cookies keep their shape.
- Preheat oven to 350°F (175°C).
- Roll dough on lightly floured surface to ¼-inch thickness.
- Cut with Halloween cookie cutters and place on parchment-lined baking sheet.
- Bake 8–10 minutes, until edges are just set (not browned).
- Cool 5 minutes on pan, then transfer to cooling rack.
- Beat powdered sugar, meringue powder, and water until smooth.
- Divide into bowls and tint with gel food coloring.
- Outline cookies with thicker icing, then flood with thinned icing.
- Add sprinkles or piping details (spiderwebs, pumpkin faces, etc.).
- Let icing dry completely before stacking or packaging.
Notes
These Halloween Sugar Cookies are the ultimate festive baking project. With buttery soft cookies as the base and endless decorating possibilities, they’re fun, delicious, and perfect for spooky season. Bake a batch for parties, trick-or-treating, or simply as a creative family activity—you’ll love how these cookies look and taste. Plus, they’re the kind of treat that makes Halloween memories last a lifetime.


Leave a Reply