
🎉 Introduction
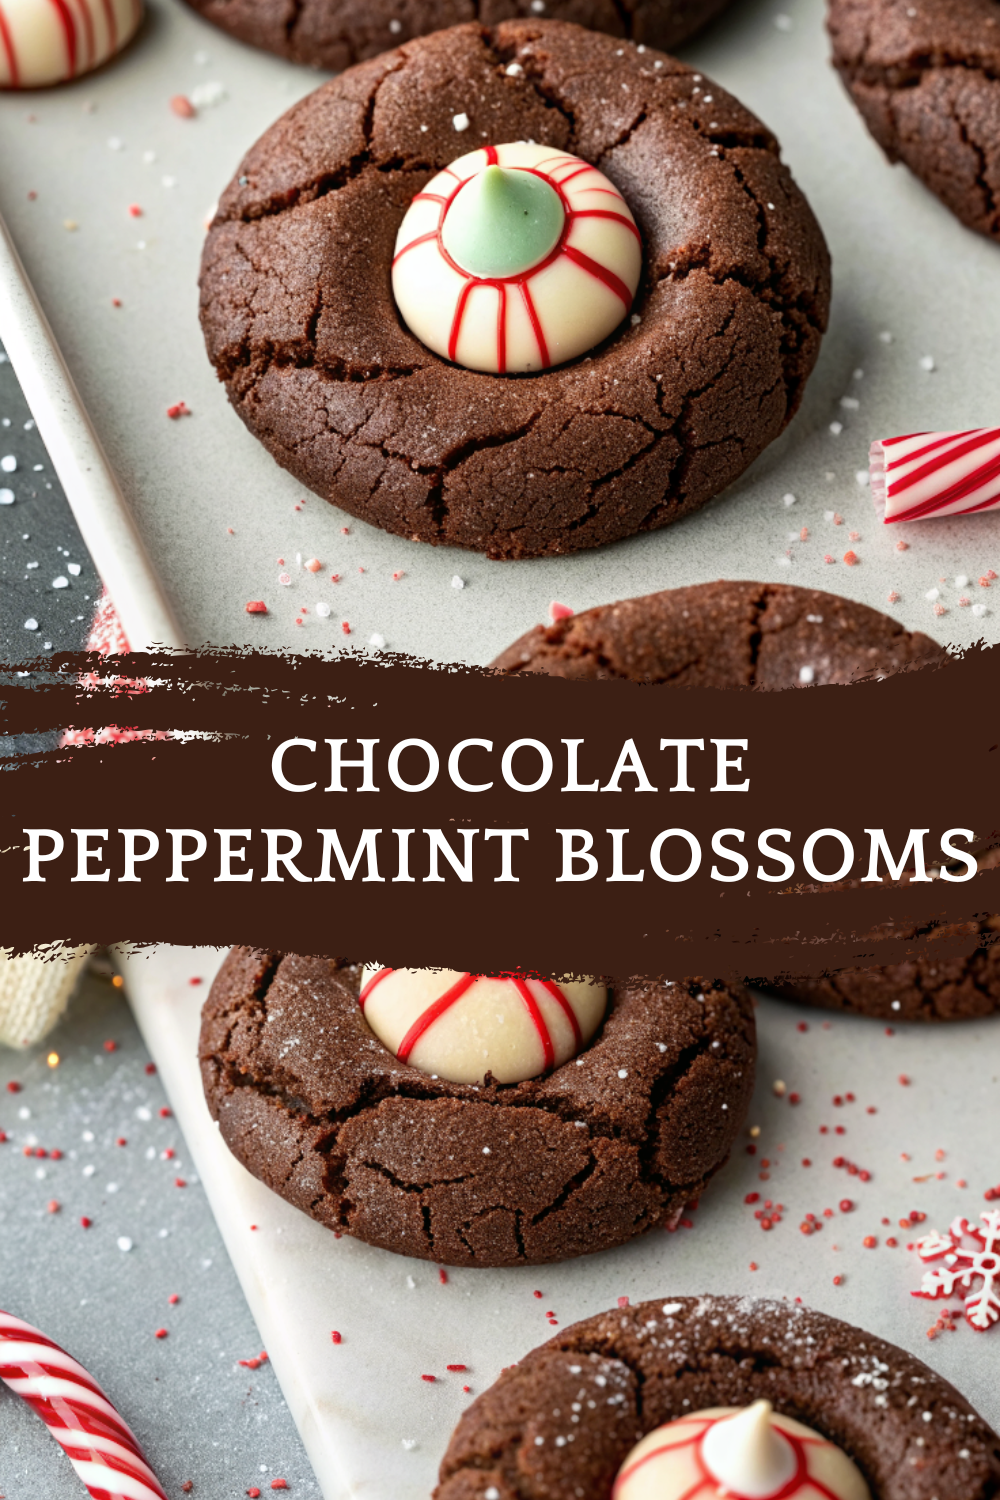
Chocolate Mint Christmas Cookies are the perfect blend of rich cocoa flavor and refreshing holiday mint, bringing together two timeless Christmas favorites into one delicious cookie. These cookies are soft, festive, colorful, and bursting with holiday cheer. With a gorgeous cocoa base, hints of peppermint, and the option to tint part of the dough a vibrant green, they deliver both flavor and visual charm — especially during the magical Christmas season.
The buttery dough creates a melt-in-your-mouth texture, while the peppermint extract adds a cool, fresh, seasonal twist. Semi-sweet chocolate chips melt into gooey bits that complement the mint perfectly. Rolled in powdered sugar, these cookies bake with festive coatings and gentle crackles that make them visually striking for Christmas cookie boxes, dessert boards, and Pinterest-ready holiday spreads.
Whether you choose to make them fully chocolate mint or marble them with green dough for extra Christmas spirit, these cookies always turn out soft, flavorful, and irresistibly festive. Perfect for holiday parties, gift boxes, cookie exchanges, Christmas Eve gatherings, or cozy winter evenings at home — they are guaranteed to become one of your go-to holiday recipes.
Let’s bake the softest, mintiest, most festive Christmas cookies ever!
🧰 Equipment Needed
- Mixing bowls
- Hand mixer or stand mixer
- Whisk
- Silicone spatula
- Measuring cups & spoons
- Baking trays
- Parchment paper
- Cookie scoop
- Bowl for powdered sugar
- Small dish for food coloring
- Cooling rack
🛒 Ingredients
Fresh Ingredients
- 1 Large egg yolk
Dry Ingredients
- 1 ¾ cups All-purpose flour
- ½ cup Unsweetened cocoa powder
- ¾ cup Granulated sugar
- 1 cup Powdered sugar (for coating)
- ¼ teaspoon Salt
Flavoring
- ½ teaspoon Peppermint extract
- 1 teaspoon Vanilla extract
- Green food coloring (optional but festive)
Chocolate
- ½ cup Semi-sweet chocolate chips
Dairy
- 1 1/16 cup Unsalted butter, softened
- 1 tablespoon Heavy cream or milk
👩🍳 Directions
Step 1: Cream Butter & Sugar
In a large bowl, beat together:
- Softened butter
- Granulated sugar
Mix for 2–3 minutes until light and creamy.
This creates the soft, smooth cookie texture.
Step 2: Add Egg Yolk, Cream & Flavorings
Mix in:
- Egg yolk
- Vanilla extract
- Peppermint extract
- Heavy cream or milk
Beat until smooth and lightly fluffy.
Step 3: Combine Dry Ingredients
In another bowl, whisk:
- Flour
- Cocoa powder
- Salt
Break up any cocoa lumps for smooth mixing.
Step 4: Form the Dough
Add dry ingredients into wet ingredients.
Fold gently until a thick chocolate dough forms.
Optional Step 5: Tint a Portion Green
For a Christmas swirl:
- Remove a small portion (¼ of the dough).
- Tint with green food coloring.
- Mix until evenly colored.
- Marble the green dough back into the chocolate dough.
This adds a beautiful Christmas look.
Step 6: Add Chocolate Chips
Fold in the semisweet chocolate chips until evenly distributed.
Step 7: Chill the Dough
Cover bowl and refrigerate for 1 hour.
Chilling helps keep cookies thick, soft, and perfectly shaped.
Step 8: Shape the Cookies
Preheat oven to 350°F (175°C).
Line baking trays with parchment paper.
Place powdered sugar in a shallow bowl.
Scoop dough into small balls (1–1½ tablespoons each).
Roll each dough ball generously in powdered sugar until fully coated.
Step 9: Bake
Bake for 10–12 minutes, or until:
- Tops crack slightly
- Edges look set
- Centers appear soft and fudgy
Soft centers are essential — do not overbake.
Step 10: Cool
Let cookies rest on the baking tray for 5 minutes.
Move to a cooling rack to finish cooling.
The powdered sugar coating and green swirls give a beautiful Christmas look.
🍽️ Servings & Timing
- Servings: 22–26 cookies
- Prep Time: 12 minutes
- Chill Time: 1 hour
- Bake Time: 10–12 minutes
- Total Time: ~1 hour 25 minutes
🧊 Storage & Reheating
Room Temperature
Store cookies in an airtight container for 5–6 days.
Freezer
Freeze baked cookies or dough balls up to 2 months.
Reheating
Microwave for 5–6 seconds for warm, soft centers.
🥄 Variations
1. Chocolate Mint Swirl Cookies
Marble green and chocolate dough for a festive look.
2. Mint Chocolate Chip Crinkles
Add extra chocolate chips + roll in powdered sugar twice.
3. Dark Chocolate Mint Cookies
Use dark cocoa for richer color and flavor.
4. Triple Mint Cookies
Add mini mint chips + peppermint extract + crushed candy canes.
5. Thin & Crispy Mint Cookies
Skip chilling the dough for a crispier texture.
6. Creamy Mint-Filled Cookies
Stuff each dough ball with a small mint-flavored chocolate square.
❓ 10 FAQs
1. Why did my cookies not crack?
The dough wasn’t cold enough — chill longer.
2. Why did the powdered sugar melt into the cookie?
Roll dough balls in a thicker coating before baking.
3. Can I make these without cocoa?
No — it’s essential for chocolate mint flavor.
4. Can I use peppermint oil instead?
Yes — just use a tiny amount (⅛ teaspoon).
5. Can I use chocolate chunks instead of chips?
Yes — chunks melt beautifully.
6. Why are my cookies dry?
They were overbaked — remove while centers are soft.
7. Can I freeze the dough?
Yes — freeze after rolling into balls (before coating in sugar).
8. Can I add green sprinkles?
Yes — they add a fun Christmas look.
9. Can I make these gluten-free?
Use a 1:1 gluten-free flour blend.
10. Can I double the recipe?
Absolutely — perfect for Christmas cookie boxes.
🏁 Conclusion
These Chocolate Mint Christmas Cookies bring together everything magical about the holiday season — rich chocolate, refreshing peppermint, creamy butter, and festive colors that brighten any dessert table. Soft, fudgy, and beautifully coated in powdered sugar, they offer the perfect balance of sweetness, minty coolness, and cozy winter warmth.
Whether you include the optional green swirl or keep them classic chocolate mint, these cookies always impress. Serve them at Christmas gatherings, package them in cookie gift boxes, pair them with hot chocolate, or feature them in Pinterest-friendly Christmas spreads. They’re simple, beautiful, and delicious — a holiday essential that will become a yearly favorite.
Bake them, share them, and enjoy the flavors of Christmas in every bite!

Chocolate Mint Christmas Cookies – Soft, Festive & Delightfully Minty
Ingredients
✨ Kitchen Essentials You’ll Love
Quick picks I trust for better results, faster prep, and easier cleanup.
-
🍳View ↗
Lodge Seasoned Cast Iron Skillet
-
⚡View ↗
Instant Pot Duo Plus 9-in-1 Electric
-
🔥View ↗
CHEFMAN Digital Air Fryer XL 10L
Disclosure: As an Amazon Associate, I earn from qualifying purchases at no extra cost to you.
Equipment
Method
- In a large bowl, beat together:
- Softened butter
- Granulated sugar
- Mix for 2–3 minutes until light and creamy.
- This creates the soft, smooth cookie texture.
- Mix in:
- Egg yolk
- Vanilla extract
- Peppermint extract
- Heavy cream or milk
- Beat until smooth and lightly fluffy.
- In another bowl, whisk:
- Flour
- Cocoa powder
- Salt
- Break up any cocoa lumps for smooth mixing.
- Add dry ingredients into wet ingredients.
- Fold gently until a thick chocolate dough forms.
- Optional Step 5: Tint a Portion Green
- For a Christmas swirl:
- Remove a small portion (¼ of the dough).
- Tint with green food coloring.
- Mix until evenly colored.
- Marble the green dough back into the chocolate dough.
- This adds a beautiful Christmas look.
- Fold in the semisweet chocolate chips until evenly distributed.
- Cover bowl and refrigerate for 1 hour.
- Chilling helps keep cookies thick, soft, and perfectly shaped.
- Preheat oven to 350°F (175°C).
- Line baking trays with parchment paper.
- Place powdered sugar in a shallow bowl.
- Scoop dough into small balls (1–1½ tablespoons each).
- Roll each dough ball generously in powdered sugar until fully coated.
- Bake for 10–12 minutes, or until:
- Tops crack slightly
- Edges look set
- Centers appear soft and fudgy
- Soft centers are essential — do not overbake.
- Let cookies rest on the baking tray for 5 minutes.
- Move to a cooling rack to finish cooling.
- The powdered sugar coating and green swirls give a beautiful Christmas look.
Notes
Room Temperature Store cookies in an airtight container for 5–6 days. Freezer Freeze baked cookies or dough balls up to 2 months. Reheating Microwave for 5–6 seconds for warm, soft centers. 🥄 Variations
1. Chocolate Mint Swirl Cookies Marble green and chocolate dough for a festive look. 2. Mint Chocolate Chip Crinkles Add extra chocolate chips + roll in powdered sugar twice. 3. Dark Chocolate Mint Cookies Use dark cocoa for richer color and flavor. 4. Triple Mint Cookies Add mini mint chips + peppermint extract + crushed candy canes. 5. Thin & Crispy Mint Cookies Skip chilling the dough for a crispier texture. 6. Creamy Mint-Filled Cookies Stuff each dough ball with a small mint-flavored chocolate square. ❓ 10 FAQs
1. Why did my cookies not crack? The dough wasn’t cold enough — chill longer. 2. Why did the powdered sugar melt into the cookie? Roll dough balls in a thicker coating before baking. 3. Can I make these without cocoa? No — it’s essential for chocolate mint flavor. 4. Can I use peppermint oil instead? Yes — just use a tiny amount (⅛ teaspoon). 5. Can I use chocolate chunks instead of chips? Yes — chunks melt beautifully. 6. Why are my cookies dry? They were overbaked — remove while centers are soft. 7. Can I freeze the dough? Yes — freeze after rolling into balls (before coating in sugar). 8. Can I add green sprinkles? Yes — they add a fun Christmas look. 9. Can I make these gluten-free? Use a 1:1 gluten-free flour blend. 10. Can I double the recipe? Absolutely — perfect for Christmas cookie boxes. 🏁 Conclusion These Chocolate Mint Christmas Cookies bring together everything magical about the holiday season — rich chocolate, refreshing peppermint, creamy butter, and festive colors that brighten any dessert table. Soft, fudgy, and beautifully coated in powdered sugar, they offer the perfect balance of sweetness, minty coolness, and cozy winter warmth. Whether you include the optional green swirl or keep them classic chocolate mint, these cookies always impress. Serve them at Christmas gatherings, package them in cookie gift boxes, pair them with hot chocolate, or feature them in Pinterest-friendly Christmas spreads. They’re simple, beautiful, and delicious — a holiday essential that will become a yearly favorite. Bake them, share them, and enjoy the flavors of Christmas in every bite!


Leave a Reply