🎉 Introduction
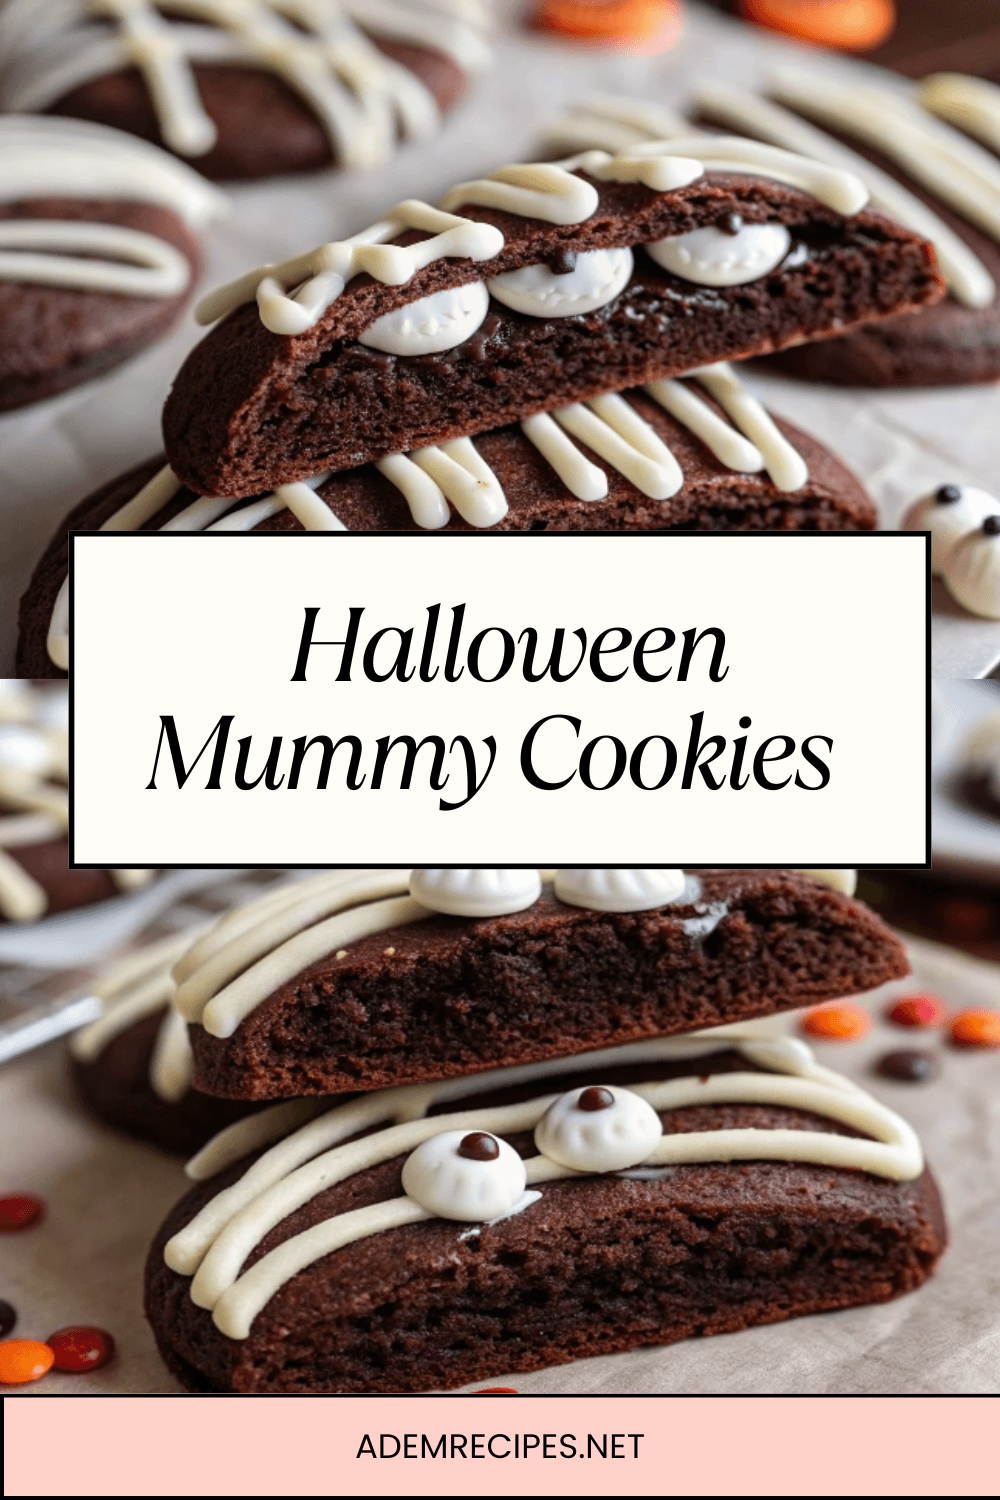
Halloween isn’t just about costumes and candy — it’s also about creative and fun treats! These Halloween Mummy Cookies are the perfect dessert to serve at your party table or to bake with kids. Soft and fudgy with a deep chocolate flavor, they’re decorated with white icing “bandages” and candy eyes, turning simple cookies into festive, edible mummies.
Not only are these cookies delicious, but they’re also easy to make in one bowl with pantry staples like flour, cocoa, butter, and sugar. The decorating is where the fun begins — you can keep it simple or go all out to make your spooky mummies as scary or silly as you like.
🧰 Equipment Needed
- Mixing bowls
- Electric hand or stand mixer
- Measuring cups & spoons
- Baking sheets
- Parchment paper
- Cooling rack
- Piping bag (for mummy bandages)
🛒 Ingredients
🥚 Fresh Produce:
- 1 egg
- 1 egg yolk
🌾 Flour & Dry Goods:
- 260 g all-purpose flour
- ¾ tsp baking powder
- ¾ tsp baking soda
- 50 g dark brown sugar
- 40 g cocoa powder
- 200 g granulated sugar
- 80 g powdered sugar (for icing)
- ¾ tsp salt
🍦 Flavorings:
- 1 ½ tsp vanilla extract
🥛 Dairy:
- 200 g butter, softened
- 1 ½ tsp milk
👀 Optional Decorations:
- Candy eyes (store-bought or homemade with icing)
👩🍳 Directions
Step 1 – Make the Cookie Dough
- In a bowl, whisk together flour, cocoa, baking powder, baking soda, and salt. Set aside.
- In a large mixing bowl, cream butter, brown sugar, and granulated sugar until light and fluffy.
- Beat in egg, egg yolk, and vanilla until combined.
- Gradually mix in the dry ingredients until dough forms.
Step 2 – Chill the Dough
5. Wrap dough in plastic wrap and refrigerate for 30 minutes (this helps cookies keep shape).
Step 3 – Bake the Cookies
6. Preheat oven to 350°F (175°C). Line baking sheets with parchment.
7. Scoop dough into small balls and place 2 inches apart on baking sheets.
8. Bake 10–12 minutes until set around edges but soft in the middle.
9. Cool completely on a wire rack.
Step 4 – Make the Icing
10. Mix powdered sugar with milk until thick but pipeable. Transfer to piping bag.
Step 5 – Decorate as Mummies
11. Pipe zig-zag “bandages” across cooled cookies.
12. Place candy eyes on each cookie before icing dries.
🍽️ Servings & Timing
- Servings: ~20 cookies
- Prep Time: 20 minutes
- Chill Time: 30 minutes
- Bake Time: 12 minutes
- Total Time: ~1 hour
🧊 Storage & Reheating
- Store cookies in an airtight container at room temperature for 4–5 days.
- Freeze undecorated cookies up to 2 months. Decorate after thawing for best results.
🥄 Variations
- Pumpkin Spice Mummies: Add 1 tsp pumpkin pie spice to the dough.
- Gluten-Free: Use a 1:1 gluten-free flour substitute.
- Extra Chocolatey: Stir in mini chocolate chips to the dough.
- Colorful Bandages: Tint icing green, purple, or orange for a fun twist.
❓ 10 FAQs
- Do I need candy eyes?
No, you can pipe eyes with icing instead. - Can I make these ahead of time?
Yes, cookies can be baked and frozen, then decorated later. - What if my icing is too runny?
Add more powdered sugar until thicker. - Can kids help with this recipe?
Absolutely — they’ll love piping bandages and adding eyes. - Do I need to chill the dough?
Yes, chilling prevents spreading. - Can I make them without cocoa powder?
Yes, but they won’t be chocolatey (just classic sugar cookies). - Can I substitute margarine for butter?
Butter is best for flavor, but margarine works in a pinch. - Can I use store-bought cookie dough?
Yes! Just bake, cool, and decorate. - How do I make them softer?
Slightly underbake so centers stay chewy. - How do I transport decorated cookies?
Let icing dry completely before stacking with parchment paper.
🏁 Conclusion
These Halloween Mummy Cookies are the perfect spooky-sweet treat for parties, trick-or-treat gatherings, or just a fun baking project at home. With soft, fudgy chocolate centers and silly mummy decorations, they’re guaranteed to disappear faster than a ghost at midnight!
Halloween Mummy Cookies | Easy Halloween Desserts
Ingredients
Equipment
Method
- In a bowl, whisk together flour, cocoa, baking powder, baking soda, and salt. Set aside.
- In a large mixing bowl, cream butter, brown sugar, and granulated sugar until light and fluffy.
- Beat in egg, egg yolk, and vanilla until combined.
- Gradually mix in the dry ingredients until dough forms.
- Wrap dough in plastic wrap and refrigerate for 30 minutes (this helps cookies keep shape).
- Preheat oven to 350°F (175°C). Line baking sheets with parchment.
- Scoop dough into small balls and place 2 inches apart on baking sheets.
- Bake 10–12 minutes until set around edges but soft in the middle.
- Cool completely on a wire rack.
- Mix powdered sugar with milk until thick but pipeable. Transfer to piping bag.
- Pipe zig-zag “bandages” across cooled cookies.
- Place candy eyes on each cookie before icing dries.
Notes
No, you can pipe eyes with icing instead. Can I make these ahead of time?
Yes, cookies can be baked and frozen, then decorated later. What if my icing is too runny?
Add more powdered sugar until thicker. Can kids help with this recipe?
Absolutely — they’ll love piping bandages and adding eyes. Do I need to chill the dough?
Yes, chilling prevents spreading. Can I make them without cocoa powder?
Yes, but they won’t be chocolatey (just classic sugar cookies). Can I substitute margarine for butter?
Butter is best for flavor, but margarine works in a pinch. Can I use store-bought cookie dough?
Yes! Just bake, cool, and decorate. How do I make them softer?
Slightly underbake so centers stay chewy. How do I transport decorated cookies?
Let icing dry completely before stacking with parchment paper. 🏁 Conclusion
These Halloween Mummy Cookies are the perfect spooky-sweet treat for parties, trick-or-treat gatherings, or just a fun baking project at home. With soft, fudgy chocolate centers and silly mummy decorations, they’re guaranteed to disappear faster than a ghost at midnight!