🎉 Introduction
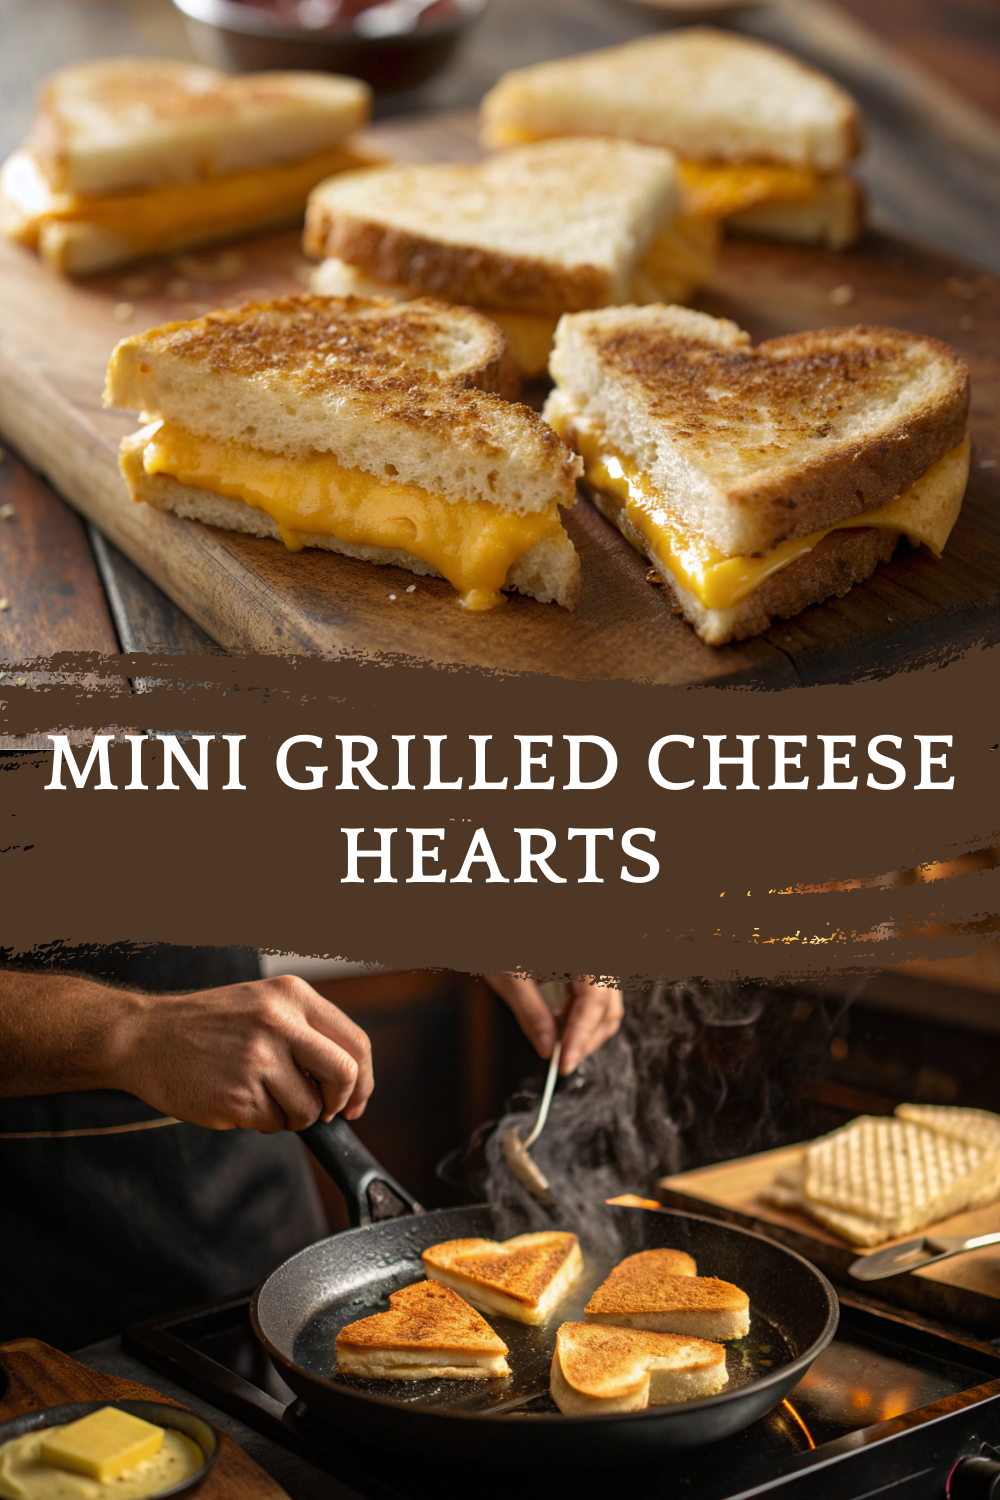
Few foods spark instant comfort like grilled cheese. Now imagine that same golden crunch and gooey center—shaped into adorable hearts and served in mini form. These Mini Grilled Cheese Hearts are playful, cozy, and irresistibly delicious. They’re perfect for family gatherings, lunchboxes, party platters, or anytime you want to turn a simple classic into something extra special.
This recipe keeps things simple and familiar while adding a charming twist. With crisp bread, buttery edges, and stretchy melted cheese, these mini sandwiches deliver big flavor in small bites. They’re quick to make, easy to customize, and guaranteed to disappear fast.
🧰 Equipment Needed
To make these mini grilled cheese hearts, gather the following tools:
- Non-stick skillet or griddle
- Heart-shaped cookie cutter (small to medium size)
- Spatula
- Butter knife or pastry brush
- Cutting board
Optional but useful:
- Panini press
- Cooling rack
🛒 Ingredients
For the sandwiches:
- 8 slices soft sandwich bread (white or whole wheat)
- 4 slices cheddar cheese or mozzarella cheese
- 3 tablespoons unsalted butter, softened
Optional flavor upgrades:
- 1 teaspoon garlic powder
- 1 tablespoon finely chopped fresh herbs (such as parsley)
- Pinch of black pepper
👩🍳 Directions
Step 1: Prepare the Bread
Lay the bread slices flat on a cutting board. Using the heart-shaped cookie cutter, cut out heart shapes from each slice. You should get one large heart per slice.
Step 2: Butter the Bread
Lightly spread butter on one side of each bread heart. For extra flavor, mix garlic powder or herbs into the butter before spreading.
Step 3: Assemble the Sandwiches
Place a slice of cheese between two bread hearts, with the buttered sides facing outward. Gently press together.
Step 4: Heat the Pan
Preheat a skillet over medium-low heat. Place the assembled hearts into the pan, making sure not to overcrowd.
Step 5: Grill to Perfection
Cook for 2–3 minutes per side, pressing lightly with a spatula, until the bread turns golden brown and the cheese melts fully.
Step 6: Serve Warm
Remove from the pan and let cool slightly before serving.
🍽️ Servings & Timing
- Servings: 12 mini heart sandwiches
- Prep Time: 10 minutes
- Cook Time: 10 minutes
- Total Time: 20 minutes
🧊 Storage & Reheating
- Best enjoyed fresh and warm
- Store leftovers in an airtight container in the refrigerator for up to 2 days
- Reheat in a skillet over low heat to restore crispness
- Avoid microwaving, as it softens the bread
🥄 Variations
Customize your mini grilled cheese hearts with these ideas:
- Cheese Lover’s Version: Mix mozzarella with cheddar
- Herb Butter Version: Add dried oregano or basil to the butter
- Crunchy Version: Lightly toast bread before assembling
- Kid-Friendly Version: Use mild cheese and thinner bread
❓ 10 FAQs
- What bread works best for this recipe?
Soft sandwich bread cuts cleanly and grills evenly. - Can I use sliced cheese or shredded cheese?
Both work, but sliced cheese melts more evenly. - Do I need a heart-shaped cutter?
Yes, for the heart shape. Any size works. - Can I make these ahead of time?
They’re best fresh, but can be reheated gently. - What cheese melts best?
Cheddar and mozzarella are excellent choices. - Can I cook these in the oven?
A skillet gives better browning, but oven baking works at low heat. - Are these good for parties?
Yes, they’re perfect finger food. - Can kids help make this recipe?
Absolutely—cutting shapes and assembling is fun and safe. - How do I prevent burning?
Cook on medium-low heat and watch closely. - Can I make them crispier?
Use slightly more butter and cook a bit longer on low heat.
🏁 Conclusion
Mini Grilled Cheese Hearts prove that simple food can still feel special. Crispy on the outside, melty on the inside, and shaped with love, these tiny sandwiches bring joy to any table. Whether you’re serving them to kids, guests, or yourself, they deliver comfort and charm in every bite.
Mini Grilled Cheese Hearts – Crispy, Melty, and Perfectly Bite-Sized
Ingredients
Equipment
Method
- Lay the bread slices flat on a cutting board. Using the heart-shaped cookie cutter, cut out heart shapes from each slice. You should get one large heart per slice.
- Lightly spread butter on one side of each bread heart. For extra flavor, mix garlic powder or herbs into the butter before spreading.
- Place a slice of cheese between two bread hearts, with the buttered sides facing outward. Gently press together.
- Preheat a skillet over medium-low heat. Place the assembled hearts into the pan, making sure not to overcrowd.
- Cook for 2–3 minutes per side, pressing lightly with a spatula, until the bread turns golden brown and the cheese melts fully.
- Remove from the pan and let cool slightly before serving.
Notes
Soft sandwich bread cuts cleanly and grills evenly. Can I use sliced cheese or shredded cheese?
Both work, but sliced cheese melts more evenly. Do I need a heart-shaped cutter?
Yes, for the heart shape. Any size works. Can I make these ahead of time?
They’re best fresh, but can be reheated gently. What cheese melts best?
Cheddar and mozzarella are excellent choices. Can I cook these in the oven?
A skillet gives better browning, but oven baking works at low heat. Are these good for parties?
Yes, they’re perfect finger food. Can kids help make this recipe?
Absolutely—cutting shapes and assembling is fun and safe. How do I prevent burning?
Cook on medium-low heat and watch closely. Can I make them crispier?
Use slightly more butter and cook a bit longer on low heat. 🏁 Conclusion Mini Grilled Cheese Hearts prove that simple food can still feel special. Crispy on the outside, melty on the inside, and shaped with love, these tiny sandwiches bring joy to any table. Whether you’re serving them to kids, guests, or yourself, they deliver comfort and charm in every bite.